Administrator guide
Castles & Coasts Housing Association (CCHA) — Buyer & Platform Documentation Audience: CCHA staff | Platform: Geckr Procure
Who this is for
CCHA's system administrator(s) in the sysadmin team and Geckr's named operator: you maintain the organisation and departments, users and roles, access reviews, multi-factor authentication, branding, letter and notice templates, the KPI library, retention and data export, integrations (FTS mode) and system health, and you read the administration audit. Priya Shah is the administrator persona in the demo tenant.
Before you start (sign-in, MFA, sign-in email, browser)
- Sign in with your CCHA email address and password, or with Sign in with Microsoft where Geckr has set it up for CCHA. Administrator accounts require MFA; enrol at
/auth/mfa/enrolon first sign-in. - Administration screens live under
/a. Business data (exercises, contracts) is not edited here — administration changes configuration and access only. - Every change you make is written to the audit trail with before/after values.
Your dashboard and task inbox
The admin area is at /a. Its menu has Organisation (Overview, Organisation and departments, Suppliers, Users and roles, Access reviews, Multi-factor authentication, Buyer profile), Configuration (Templates, KPI library, Social value policies, Retention and export, STAIRs publication, Integrations) and Assurance (System health, Admin audit, Audit trail).
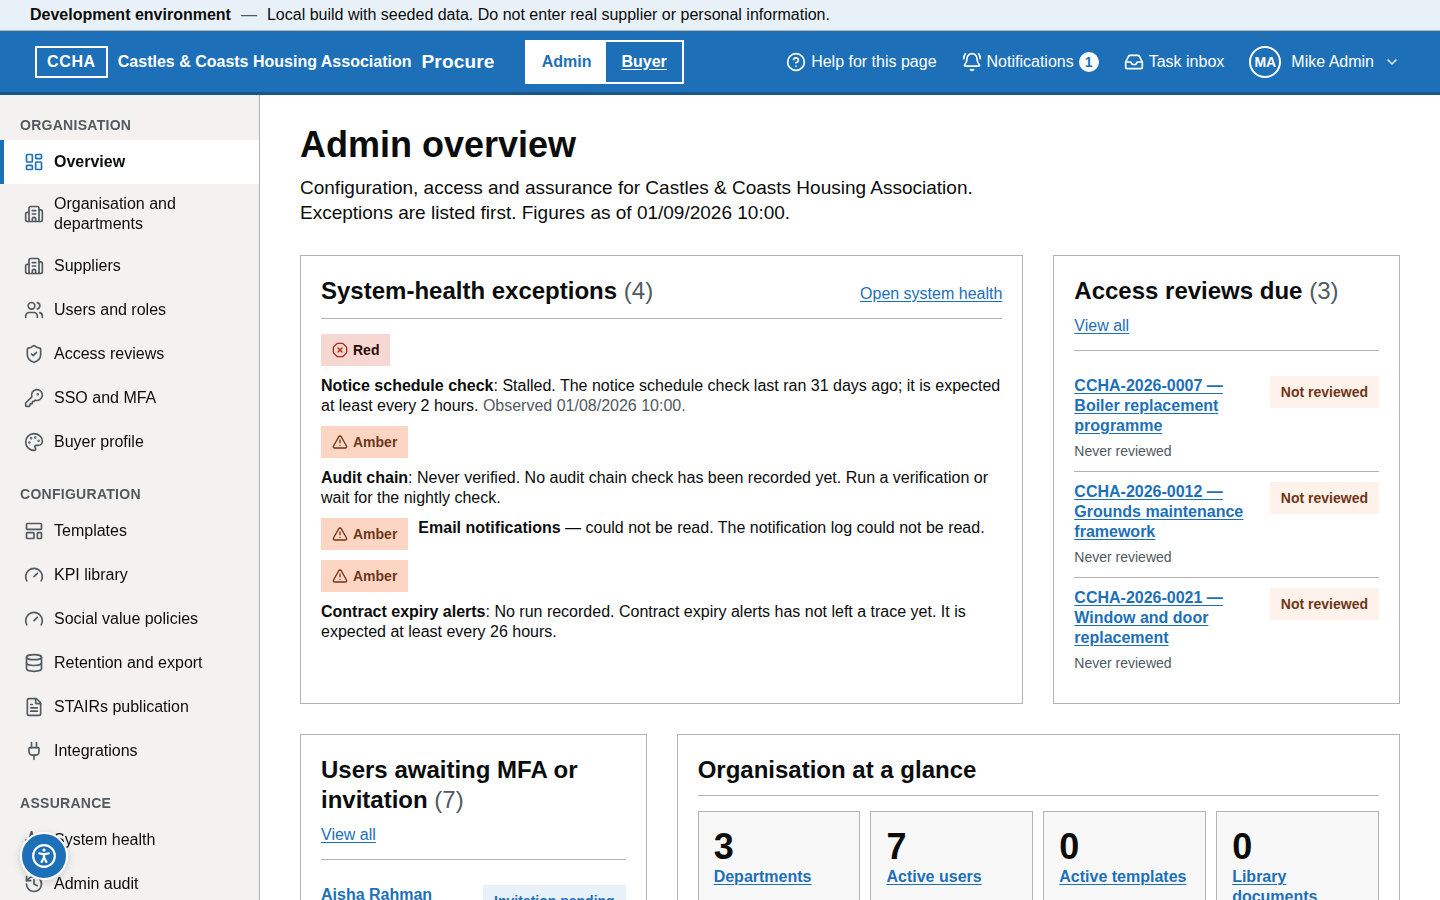
The Admin overview (/a) shows System-health exceptions (any check that is not green, such as backups or the audit chain), Access reviews due, Users awaiting MFA or invitation, Organisation at a glance (counts), Configuration (the declared Find a Tender mode, the outgoing email sender and the default letter templates) and Common admin work links. The admin area has no task inbox of its own: these cards are your to-do list. If you also work in the buyer area, its Task inbox lists the tasks assigned to you there.
Organisation and departments
Steps
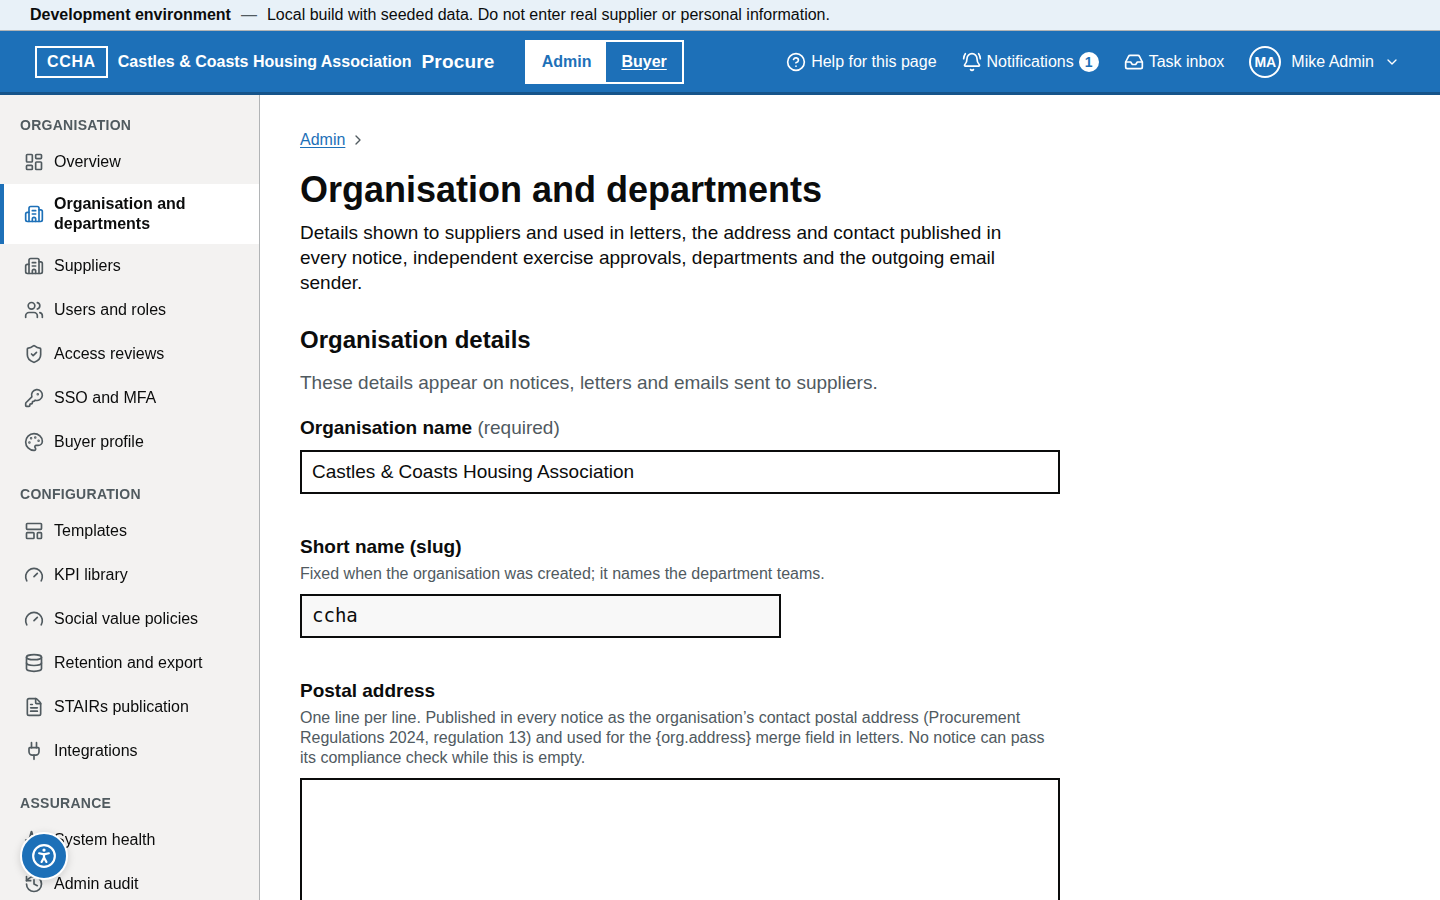
- Organisation details: Organisation name, Postal address, Region (the address's area, published in every notice as Find a Tender shows it, for example East Cumbria (UKD12)) and, under Outgoing email, the From name and From address; the Short name (slug) is fixed. The buyer identifiers for notices (Buyer identifier, eSender identifier) are set on Integrations.
- Postal address and notice contact: enter the organisation's postal address (one line per line, 500 characters at most) under Organisation details, and under Notice contact the Contact name (a person, team or role), Contact email address and, optionally, Contact telephone number for enquiries about a notice. Both are published in every notice: regulation 13 of the Procurement Regulations 2024 requires a notice to give the contracting authority's contact postal address and the name and email address of the person to contact. Use a role or shared mailbox where you can. Until both are saved, no notice can pass its compliance check (rule GEN-006).
- Departments: Add department, or open one to rename it or change its Head of department; each department has a team
dept-<slug>used for row access. - Each section has its own save button (Save organisation details, Save notice contact, Save department); changes are audited.
What you should see
The organisation record and the department list with heads.
Common problems
- Renaming a department. Renaming keeps the slug and team; merging departments needs a ticket.
- Buyer identifiers. They are on Integrations, under Central Digital Platform. They come from the Find a Tender / CDP registration; leave blank in stub mode. The Buyer identifier is the organisation's Public Procurement Organisation Number (PPON, for example PTVV-3754-HQGM): Procure needs it to record a notice published by hand on Find a Tender, or to import one, because it confirms from Find a Tender that the notice is the organisation's own.
- The procurement team says no notice can be published. The postal address or the notice contact is missing. Save both, then ask the team to recompile their draft notices: a notice compiled before the details were saved does not carry them.
- Removing the notice contact. Remove notice contact deletes it; every notice then fails its compliance check until a new one is saved. Notices already published are not changed.
Invite and manage users
Steps
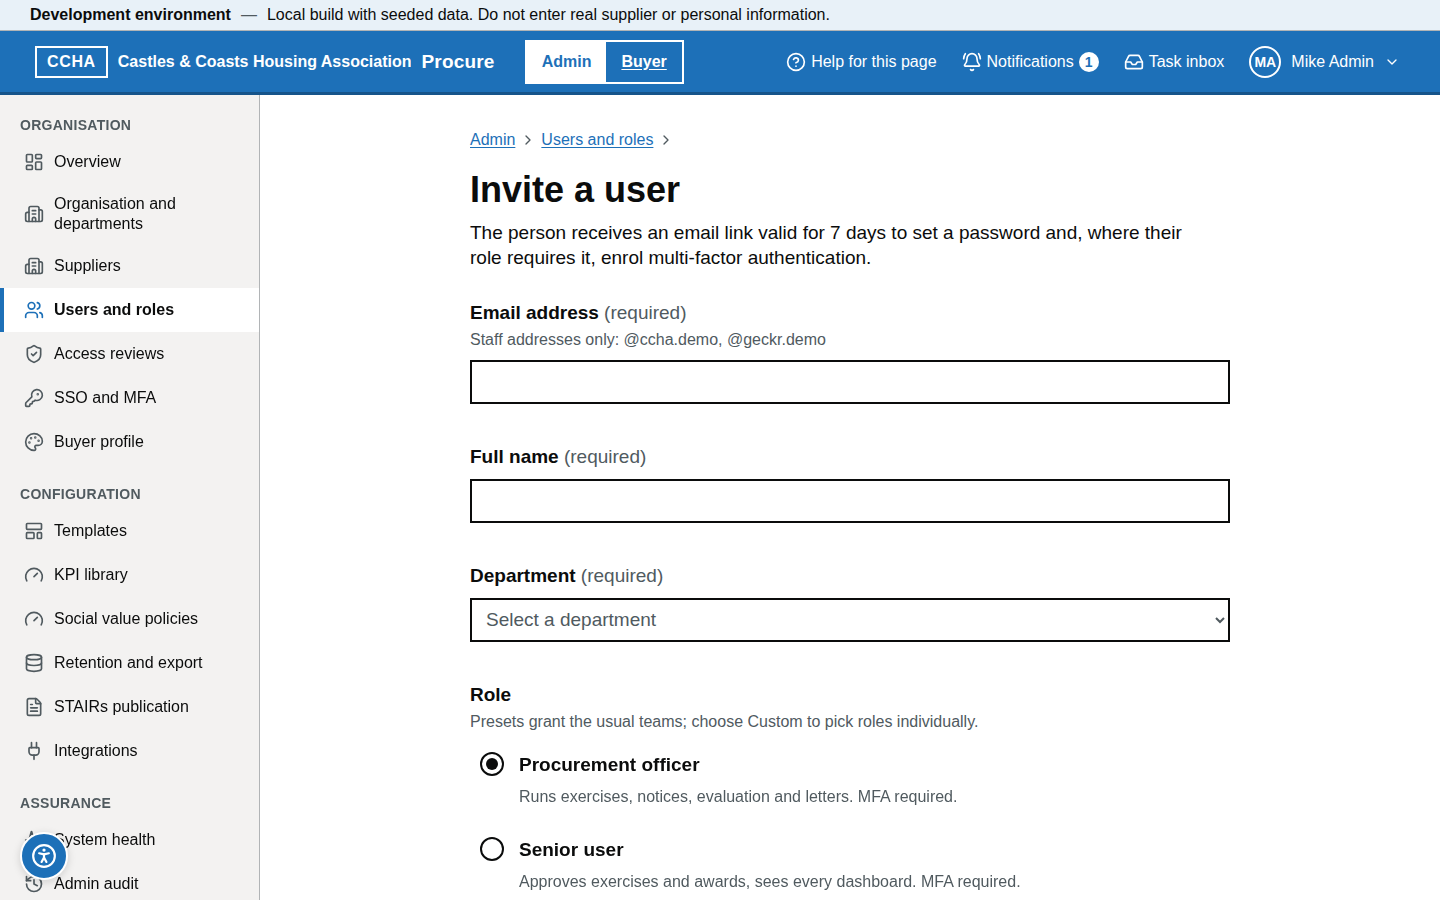
- Users and roles → Invite a user: email address (a CCHA staff domain), full name, department and a role preset (Procurement officer, Senior user, Department user, Contract manager, System administrator or Custom), then Send invitation. The presets that need MFA say "MFA required."
- The invitation email contains an acceptance link (
/auth/accept-invite, for staff only); the user sets a password and, for privileged roles, enrols MFA. Supplier users invited by their organisation get a different email that leads to a sign-in code instead. - Deactivate leavers from their user page; their history stays in the audit.
What you should see
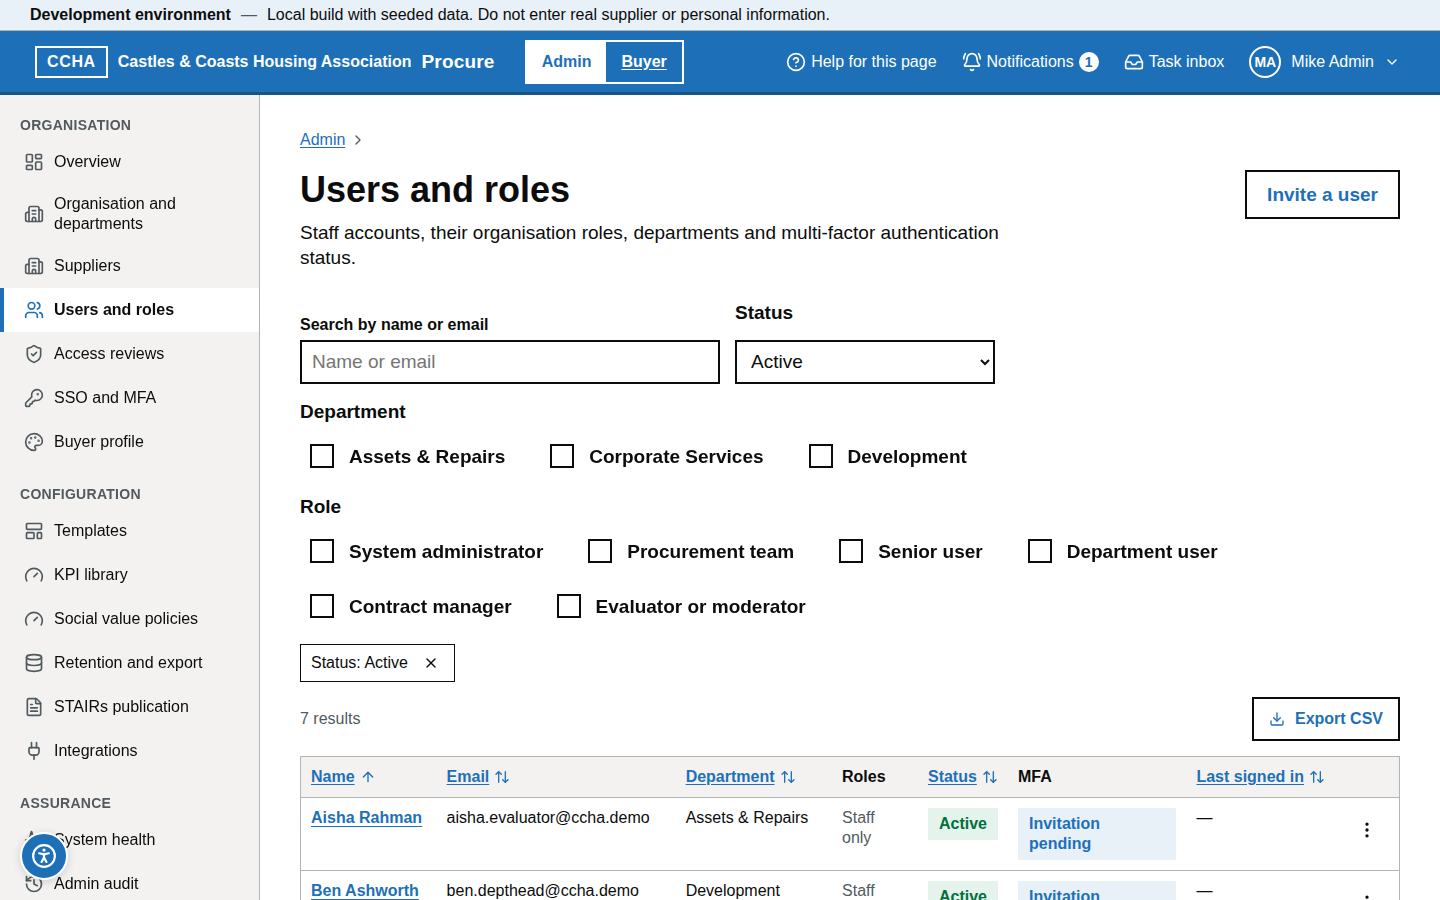
"Invitation sent to" the address; on Users and roles the MFA column shows Invitation pending until they first sign in. The presets that need MFA say so, and the form ends "Multi-factor authentication will be required."
Common problems
- Address rejected. Only the configured staff domains can be invited as staff; suppliers register themselves.
- A supplier outside the United Kingdom asks you to correct its address. Suppliers → the supplier → Edit organisation profile: choose the Country (the United Kingdom is one entry; there is no separate "UK" code), then the postal code as the supplier writes it — it may be blank. Where the organisation is based records what the supplier has told you (established in, controlled from or mainly funded from a country, and any international agreement it relies on) and is shown as "Recorded by procurement". It is information only: it must not be used to decide invitations, shortlists or scores (Procurement Act 2023, section 90). Where a declaration is on record — made by the supplier or recorded by procurement — the section offers Withdraw this declaration: tick it and save, and the record is again taken from the registered address (the hint names the country that will be used). Clear this section only empties the boxes and changes nothing on record.
- A supplier's VAT number is refused in the edit dialog. The format follows the Country of the registered address, as it does for the supplier: a GB VAT number (for example GB123456789) for the United Kingdom, otherwise the VAT or tax number as issued in the country of the registered address. Correct the country first if it is wrong.
- Invitation expired. Use Re-send invitation on the user page (under Account) or in the row's actions menu.
Role templates
Steps
- Role templates map to teams: Procurement officer (
procurement), Senior user (senior), Department user (dept-<slug>), Contract manager (acm-<contract>team, assigned on each contract), Evaluator (per exercise), System administrator (sysadmin). Every preset except Custom also adds the chosen department's team. - Assign or remove roles from the user page under Organisation roles (Procurement team, Senior user, System administrator), then Save roles; changes take effect at the user's next request.
- Evaluator and contract-manager access is granted on the exercise or contract, not here.
What you should see
Roles listed per user with the teams they imply.
Common problems
- A user can see too much. Check department membership and any senior role.
- MFA prompt for a department user. They hold a privileged role; remove it or enrol MFA.
Access reviews
Steps
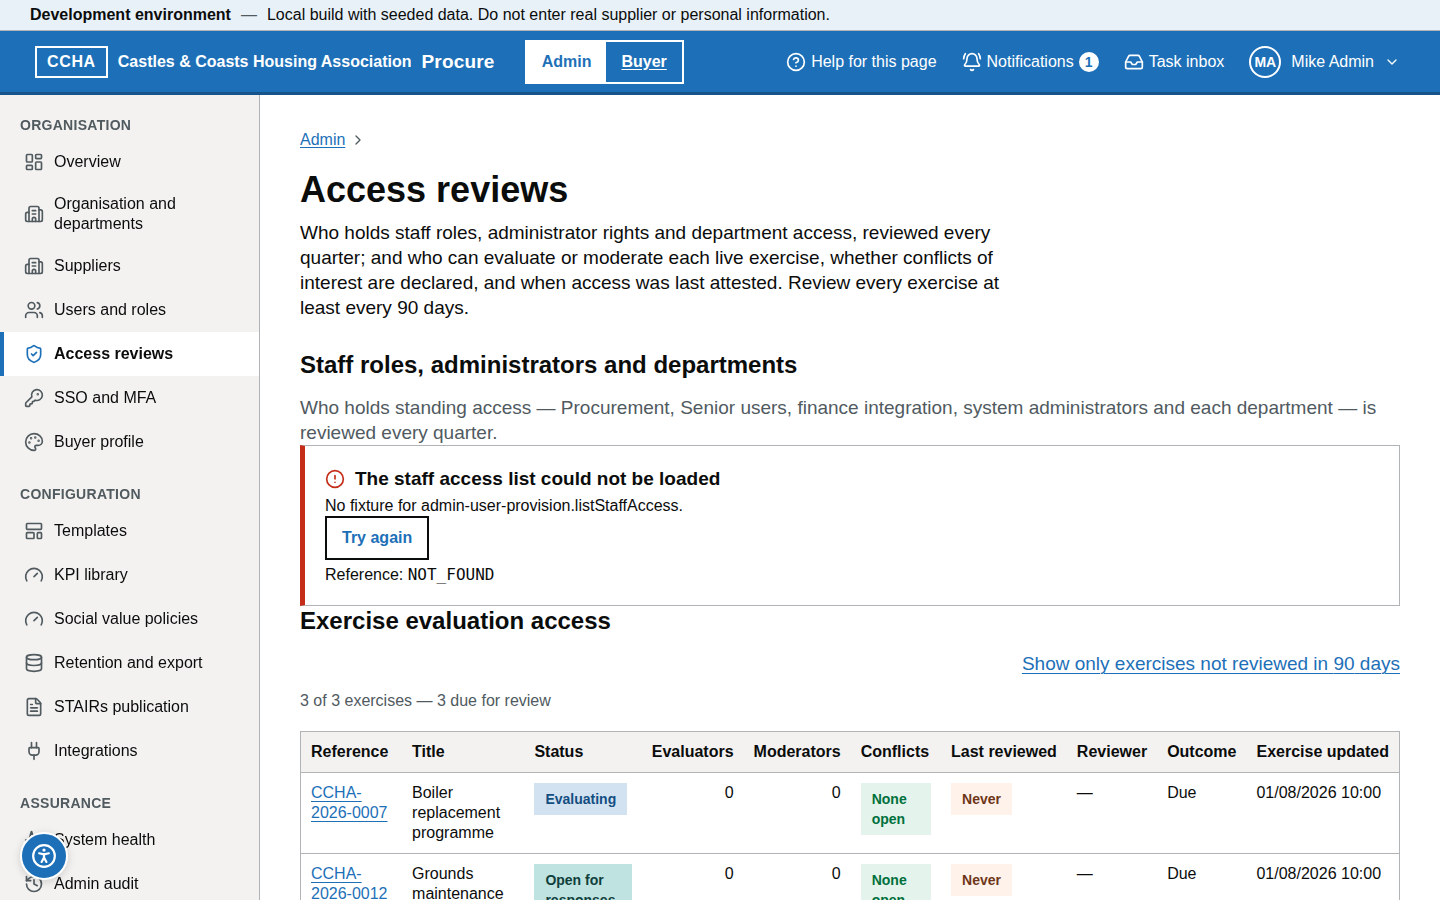
- Access reviews lists the standing staff and administrator teams under Staff roles, administrators and departments (Procurement Team, Senior users, Buyer finance integration, System administrators and each department), reviewed every quarter, and then, under Exercise evaluation access, each exercise with its evaluators, moderators and conflicts, with the date of the last review.
- Open an exercise: tick anyone whose access should be removed (everyone left unticked is confirmed), add Notes (required when removing) and choose Attest access, or Remove N and attest and confirm with Remove and attest. Open a staff team: tick Flag for removal for anyone who should lose it and choose Record review (or Flag N and record review). A staff review does not change access itself: open each flagged person and remove the role or department.
- Staff and administrator teams are due every quarter; exercise access is reviewed at least every 90 days and before every award recommendation.
What you should see
The review recorded with the reviewer, date and member count.
Common problems
- A member has a conflict. Removal here revokes access immediately and is audited; the procurement lead reassigns.
- Review overdue. It is listed under Access reviews due on the Admin overview, marked Overdue or Not reviewed; Access reviews shows the last review date of every team and exercise.
Multi-factor authentication
Steps
- Multi-factor authentication (
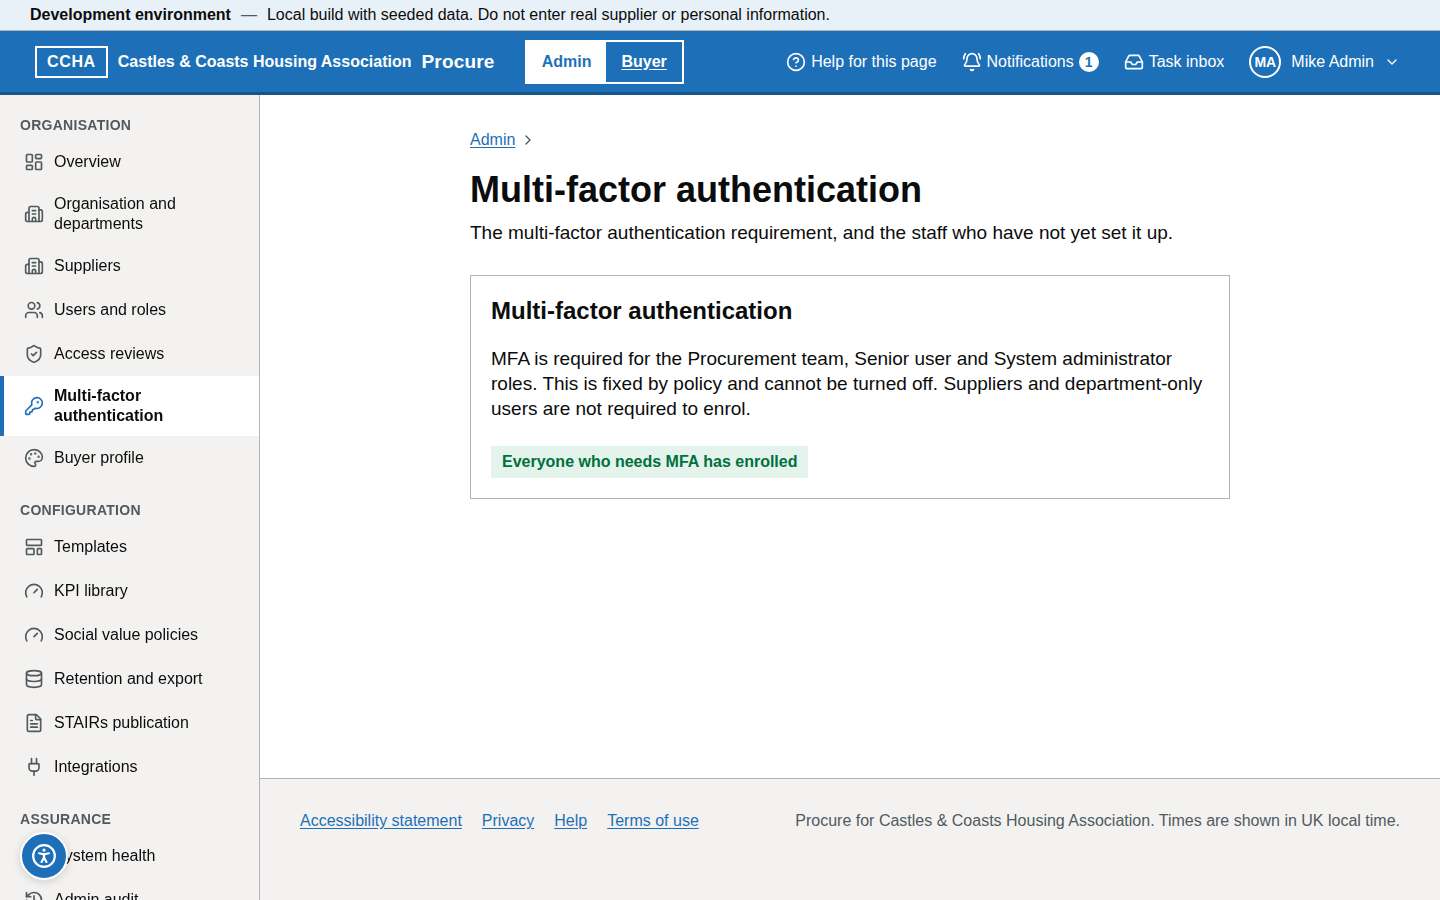
/a/mfa): MFA is required for the Procurement team, Senior user and System administrator roles; this is fixed by policy and cannot be turned off. Suppliers and department-only users are not required to enrol. The Multi-factor authentication card lists staff not yet enrolled, each with Send reminder, which opens a reminder email in your own email app. - Reset a user's MFA from their user page (Reset MFA) if they lose their device, after checking who they are. You cannot reset your own.
What you should see
The MFA requirement for those roles, and either "Everyone who needs MFA has enrolled" or the number of staff not yet enrolled.
Common problems
- MFA reset requests. Verify identity by a second channel before resetting.
- Staff sign in with Microsoft and still get an authenticator prompt. That is expected: signing in with Microsoft does not replace MFA for the roles that require it.
Microsoft sign-in and the staff directory
Microsoft sign-in (Microsoft Entra ID) and the import of staff from CCHA's Microsoft directory are set up by Geckr from CCHA's Entra ID details; there are no Microsoft settings in the admin area, and the tenant, application and secret are never shown in Geckr Procure.
Steps
- Where Microsoft sign-in is set up, the sign-in page shows Sign in with Microsoft to everyone; only staff CCHA has given access to Geckr Procure in its directory can use it.
- Where the directory import is set up, the staff CCHA gives access to Geckr Procure in its directory (usually members of one group) get an account automatically, with no access: no roles, and no invitation email. They appear in Users and roles. Who has access is decided in CCHA's directory.
- Give an imported member of staff access as for anyone else: open them in Users and roles and set their roles and department.
- When someone is disabled or removed in CCHA's directory, or loses access to Geckr Procure there (for example, is taken out of the group), the import deactivates their Geckr Procure account. Reactivate a returning member of staff yourself, in Users and roles.
What you should see
Imported staff in Users and roles with no roles until you give them some.
Common problems
- Someone cannot sign in with Microsoft ("not set up for Geckr Procure yet"). Their account is not linked yet: check they are in CCHA's directory with their CCHA email address, and wait for the next directory import, or ask Geckr to check.
- An imported account has access you did not give it. The import never gives roles; check the Admin audit for who changed it.
Branding
Steps
- Buyer profile (branding,
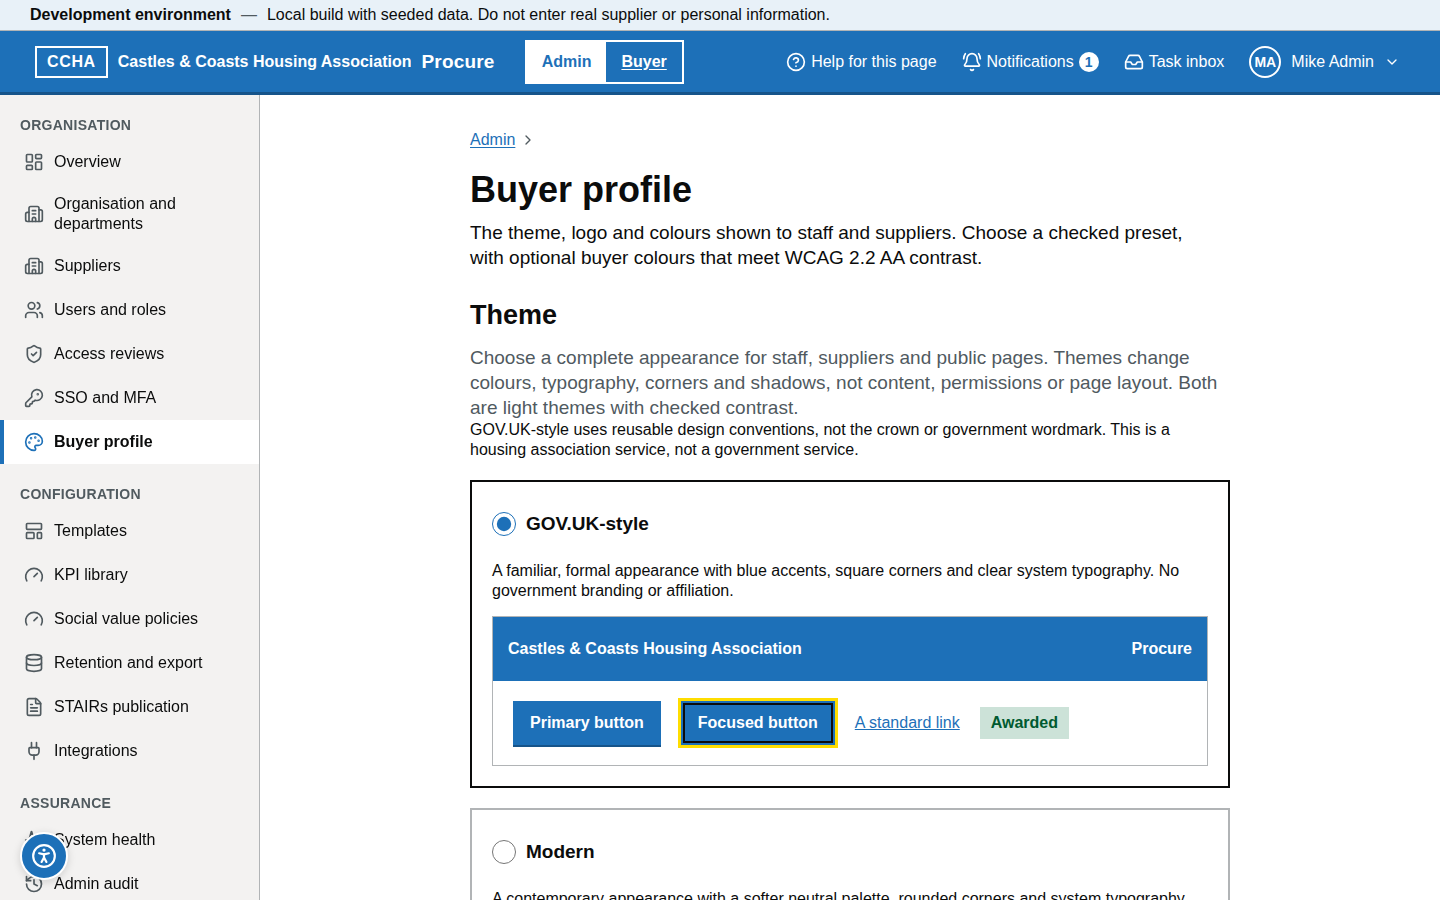
/a/branding): choose a Theme (Save theme), upload the logo under Logo (Upload a new logo: PNG, SVG or JPG), and under Optional buyer colours tick Use buyer colours on top of the selected theme to set the Primary colour and Secondary colour. - The Preview shows a static header with a primary and a focused button; contrast is checked against WCAG AA as you type. Save branding stays disabled until every reading passes: the primary colour needs 4.5:1 against white (button text) and 3:1 against the focus yellow; the secondary colour (non-text accents and chart marks — links and status colours always come from the theme) needs 3:1 against white.
- Save; staff and suppliers see the new branding when their page next loads.
What you should see
The preview updating as you change colours, with the three contrast readings below the inputs. CCHA's seeded palette reads 7.84:1 (primary against white), 3.16:1 (secondary against white) and 5.82:1 (primary against the focus colour) — primary #00558C, secondary #85994B, the GOV.UK Design System light green.
Common problems
- Contrast warning. Choose a darker colour: a primary under 4.5:1 or a secondary under 3:1 against white cannot be saved, and if such a value did reach the server the product would show the selected theme's colour for that setting rather than the failing one. Bright limes and yellows (for example the NHS light green
#78BE20, 2.29:1) fail as a secondary; text colours are derived automatically. - Logo too large. The limit is 2 MB; SVG preferred.
Letter and notice templates
Steps
- Templates → Letters → New letter template: enter a Template name and upload the DOCX (up to 10 MB) with single-brace merge fields (
{supplier.name},{exercise.title},{award.decision},{award.standstillEndsAt},{scores.table}), then Save template. Editing a template saves the next version (Save as version N) and keeps the previous one as Superseded. Preview with sample data renders the saved document with fixed sample values into a PDF; the real letters are generated from each exercise's Letters tab. - Templates → Notices is read-only: notice templates are managed by the compliance engine, and notice content is compiled from each exercise. The contact published in notices is the Notice contact under Organisation and departments.
- Templates → Questionnaires / Exercises: the starter templates the procurement team picks from (New questionnaire template, New exercise template). Each save creates a new Active version and marks the previous one Superseded; only the latest active version can be edited.
What you should see
The version number, the merge fields detected in the DOCX and a PDF preview with sample values.
Common problems
- Unknown merge field. The field list is shown on the page; correct the DOCX.
- The template is refused for its layout. Letters are laid out by Geckr Procure itself, so a template must use the supported Word layout: no floating pictures, text boxes, shapes, SmartArt, charts or equations; no columns, tracked changes, comments, footnotes or nested tables; no fields other than page numbers (a DATE or MERGEFIELD field is refused: use the single-brace merge fields); pictures must be PNG or JPEG with alternative text or marked decorative. The message names the feature to remove; save the DOCX again without it.
- Old letters changed? No — generated letters are stored; templates are versioned.
KPI library
Steps
- KPI library (
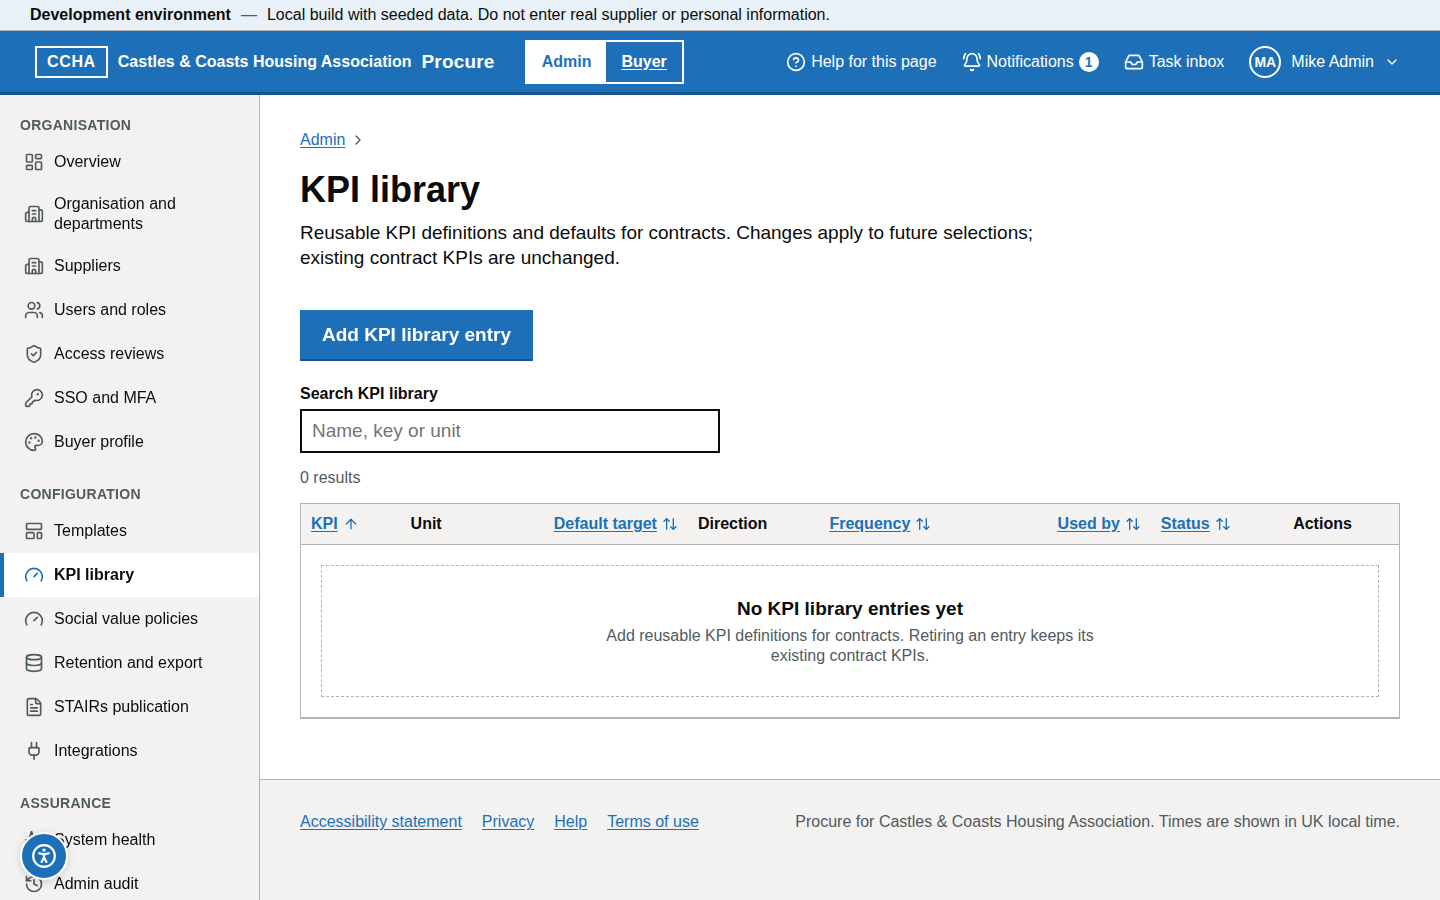
/a/kpi-library) holds the standard KPIs (name, unit, default target, direction, frequency, tolerances). - Add KPI library entry (for example "Complaints closed within 10 days"): give the KPI name, the Key (derived from the name; 2 to 64 lower-case letters, numbers or underscores), an optional Description, the Unit, the Default target (leave it blank if the target must be set for each contract), the Amber tolerance (%) and Red tolerance (%), the Direction (Higher is better or Lower is better) and the Frequency (Monthly, Quarterly or Annually), then choose Add KPI library entry.
- To change an entry, choose Edit on its row, change the fields and choose Save KPI library entry. The key is fixed after creation so that contract KPIs keep pointing at it; the hint says how many contracts use the entry.
- To retire an entry, Edit it, untick Active, choose Save KPI library entry and confirm with Retire entry. A retired entry is no longer offered when a KPI is added to a contract; tick Active again later to reactivate it.
- Contract managers add KPIs to contracts from the library; the library key keeps reporting consistent across contracts.
What you should see
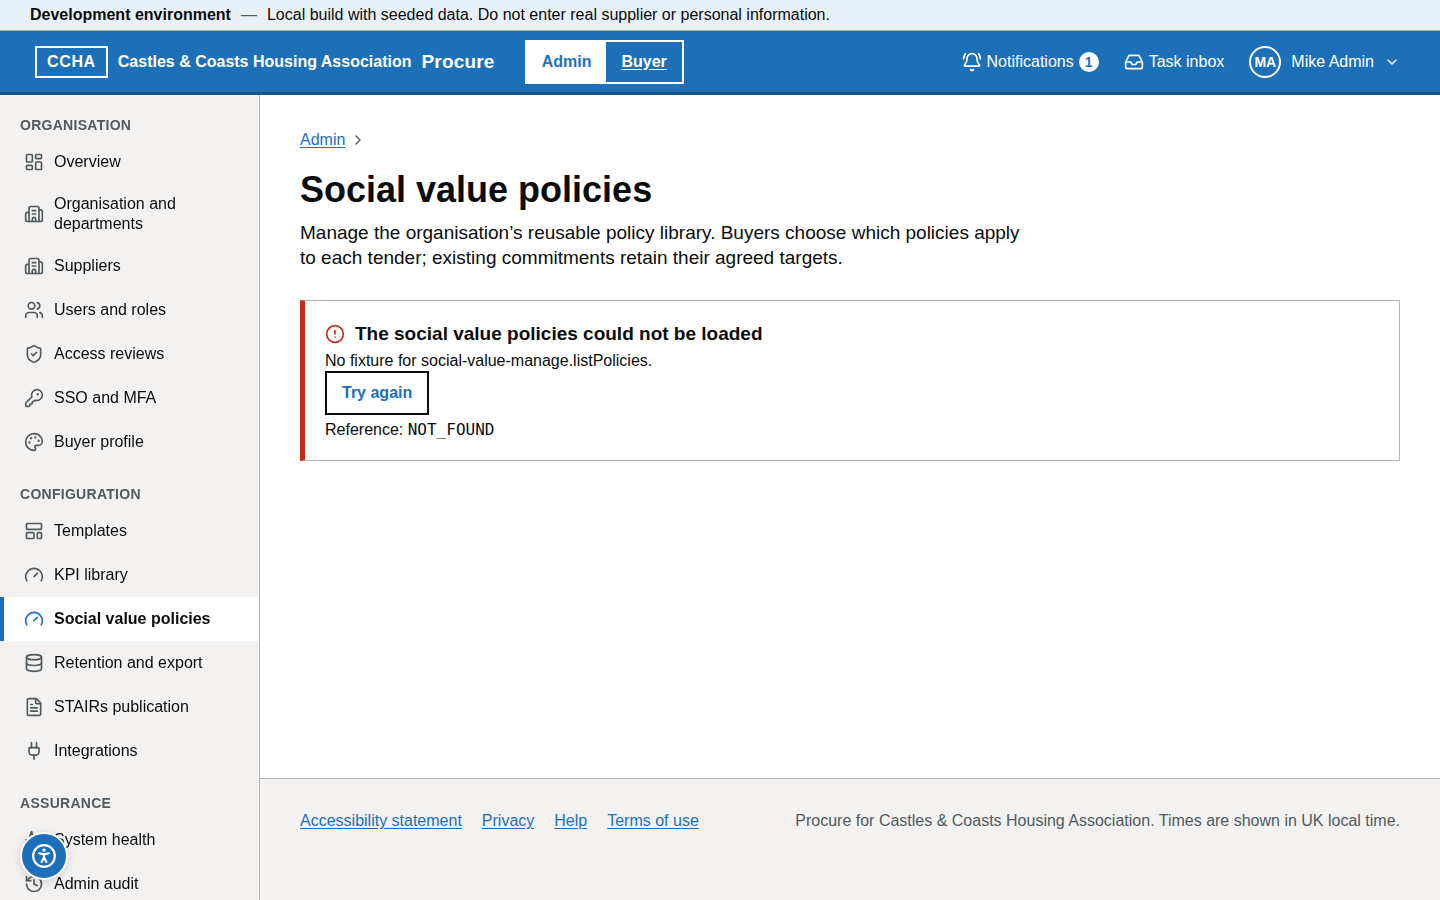
The library with active and retired KPIs.
Common problems
- Changing a target. Changes apply to new contract KPIs; existing ones keep their target unless edited on the contract.
- Retiring a KPI in use. Allowed; existing contract KPIs and their readings are unchanged.
- "Check the highlighted fields". A field is missing or out of range; the message under each field says what to correct.
Retention and data export
Steps
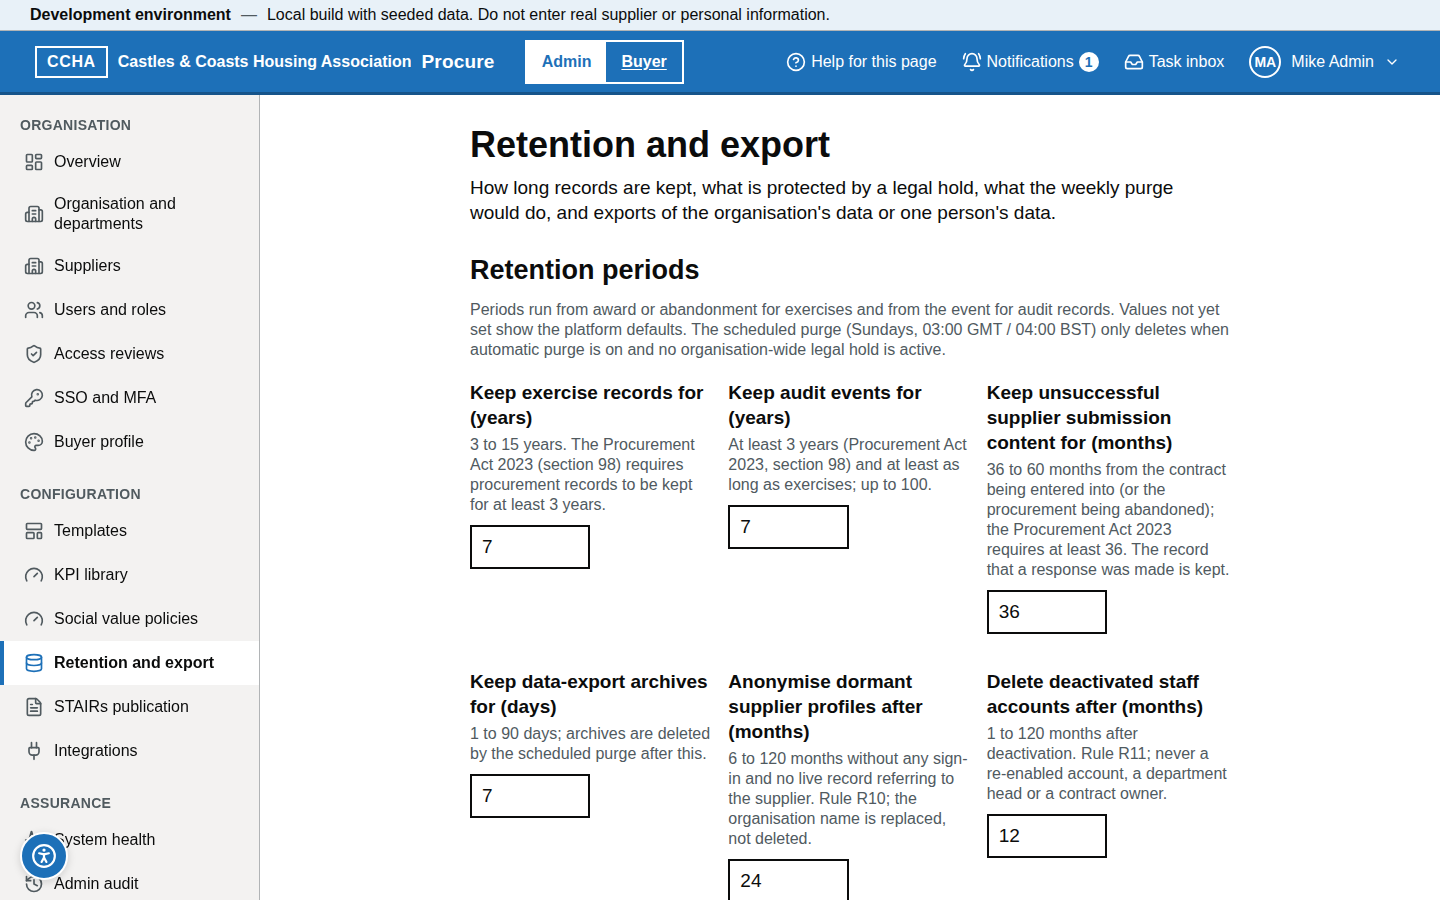
- Retention and export: exercises and audit 7 years, unsuccessful supplier submission content 36 months (the defaults — suppliers' communications are kept for three years); purging is disabled until CCHA enables it. The scheduled retention job runs every Sunday at 03:00 GMT (04:00 BST) and only reports what it would delete while Enable automatic purge is off.
- Data export: Export organisation data (every table and file in one archive, with a manifest and checksums) or, for a DSAR, Export this person's data under Subject access request export; archives are readable by you only and expire after Keep data-export archives for (days) (7 by default).
- Purge runs are logged with counts; nothing is deleted from the audit trail.
What you should see
Retention periods, the Enable automatic purge setting, Legal holds and Your export archives.
Common problems
- Export taking long. Large estates export in stages: after "Export stage completed — more to export", choose Continue export from … until "Export ready".
- Legal hold. Under Place a legal hold, choose what it Applies to (an exercise, supplier, contract, user or the whole organisation), give the Record identifier and a Reason, then Place hold; purge skips it.
- Releasing a legal hold. Enter the Reason for releasing under the hold and choose Release hold, then confirm. A release without a reason is refused ("Enter the reason for releasing the hold"). The reason, who released the hold and when are kept in the admin audit; once released, records past their retention period are purged by the next scheduled run if automatic purge is on.
Integrations: FTS mode
Steps
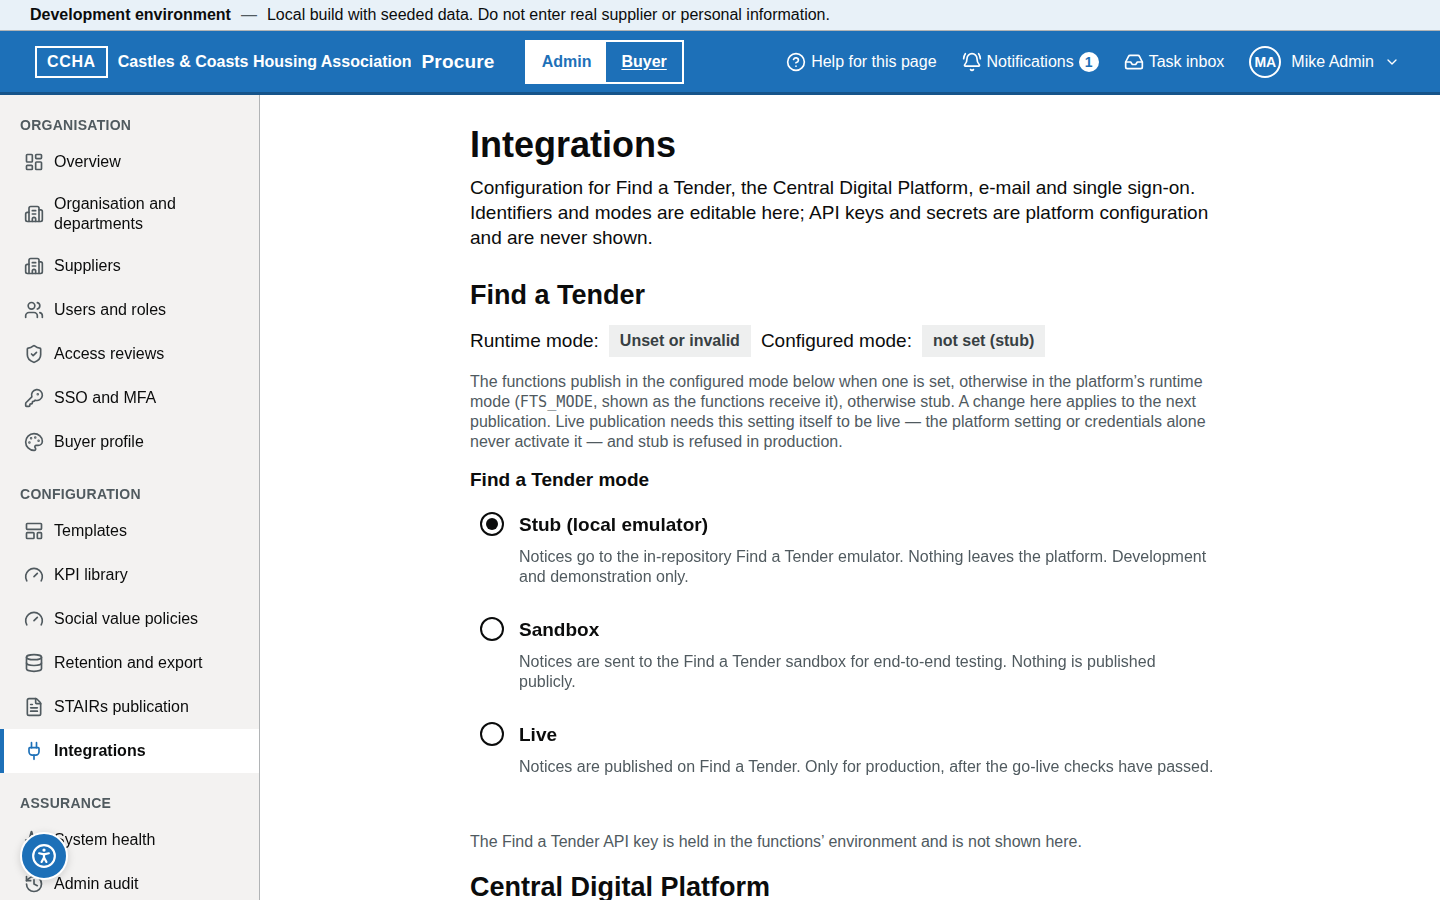
- Integrations shows the Find a Tender Runtime mode and Configured mode. Choose the Find a Tender mode — Stub (local emulator), Sandbox or Live — and set the Central Digital Platform identifiers (Buyer identifier, eSender identifier), the E-mail sender (Sender name, Sender address) and the Audit anchor recipient, then Save integration settings. Under E-mail delivery check, Send test e-mail checks delivery; Single sign-on is shown read-only.
- Publication is gated: sandbox and live need the platform's API key, held outside this page; live publication happens only when this setting itself is Live — the platform setting or credentials alone never activate it — and stub is refused in production. Switch to live only after CCHA's eSender authorisation and the go-live checks.
- The current mode is shown in a banner on the notice pages (Notices and each notice), and the declared mode on the Admin overview's Configuration card.
Find a Tender by environment
The mode that applies is the organisation's Find a Tender mode when it is set, otherwise the platform's runtime mode, otherwise the local stub. What the notice pages show and allow follows from it and from the environment:
| Where | Mode | Banner on the notice pages | Publication |
|---|---|---|---|
| Training or test site | Stub | Find a Tender: local stub: "Notices are validated against the same schema but not sent to the live service", with Open the stub inspection page | Allowed; nothing reaches Find a Tender. Stub behaviour (test only) lets you test a rejected or queued notice |
| Any site | Neither the organisation nor the platform sets a mode | Find a Tender mode not confirmed | Left to the service, which never activates live publication by default |
| Any site | Sandbox | Find a Tender sandbox: "Publications are test-only and do not appear on the public Find a Tender service" | Allowed, to the Find a Tender test service |
| Production | Stub | Find a Tender: stub mode on a production environment | Refused: "Stub publication is not permitted in production." |
| Any site | Live, set only by the platform | Find a Tender: live publication is not activated for this organisation | Refused until this page's Find a Tender mode is itself Live |
| Production | Live, set here | No banner | Published to the public Find a Tender service |
What you should see
The runtime and configured modes and the saved identifiers; "Integration settings saved" after a change, which applies to the next publication. The health of virus scanning, email notifications and the other background jobs is on System health.
Common problems
- Stub banner in production. The mode has not been switched; follow the go-live checklist, or ask the Geckr operator to complete the switch to live publication.
- SMTP failing. Emails queue and retry; check Notifications on System health, send a test e-mail, and ask the Geckr operator to check the mail server, which is platform configuration and not shown here.
System health
Steps
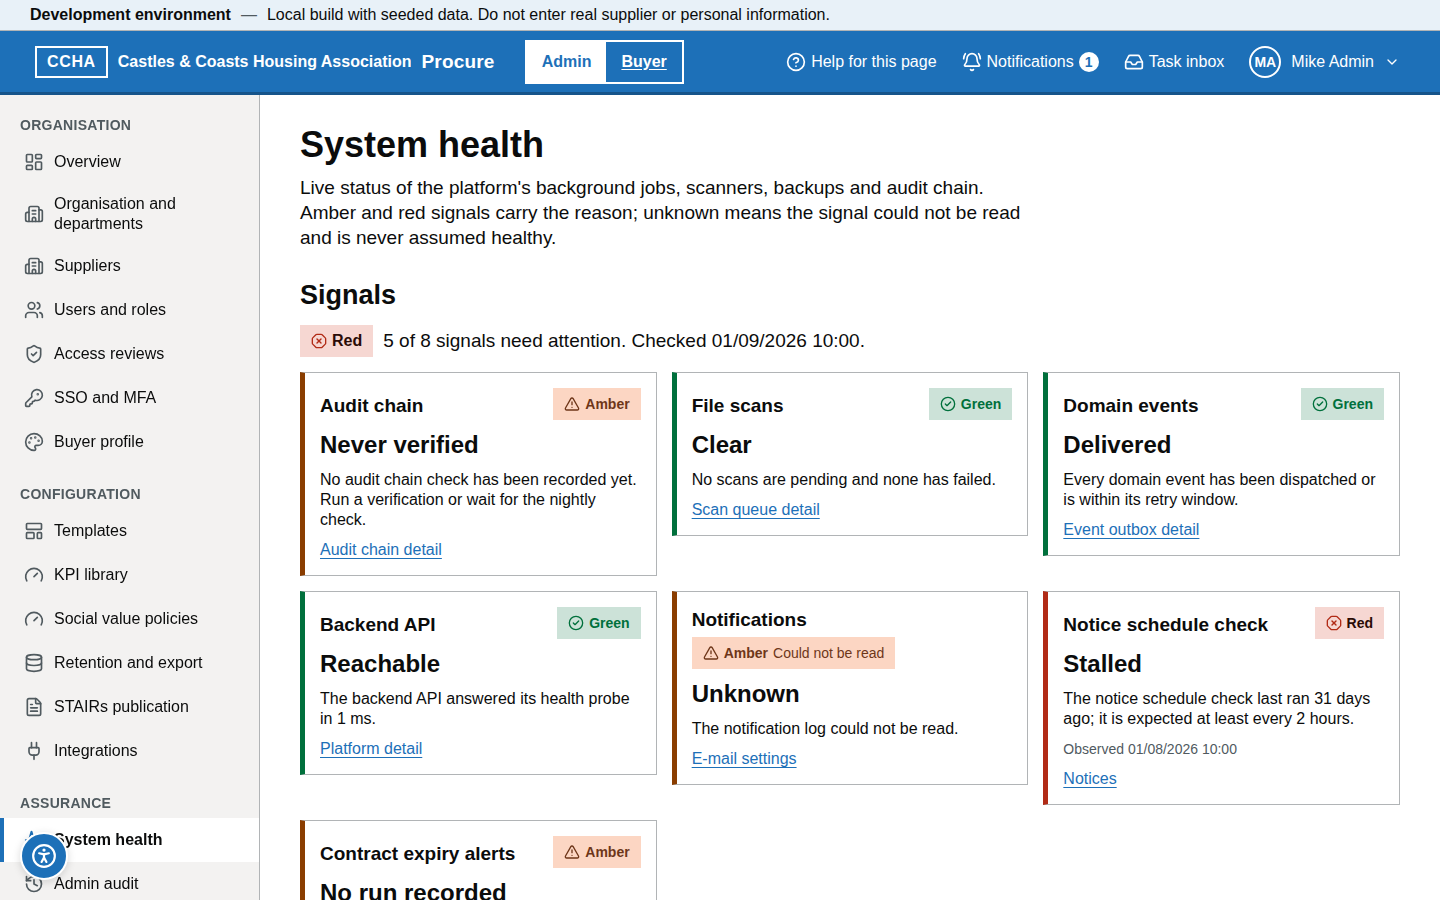
- System health shows the Signals (Audit chain, Backup, File scans, Domain events, Backend API, Notifications, Notice schedule check, Contract expiry alerts), then detail on the Content Security Policy, the audit chain, file scans and quarantine, the domain event outbox, backups, envelope encryption keys and the platform.
- Use it before raising a ticket; the helpdesk asks for the time and the panel's status line.
What you should see
Green signals and recent timestamps, with "Every signal is within its expected window." Amber and red signals carry their reason; an unknown signal could not be read and is never assumed healthy.
Common problems
- Audit chain not verified today. The nightly job runs at 02:30; if missing, raise a P2.
- Backup older than 24 hours. Raise a P1 (data at risk).
Admin audit
Steps
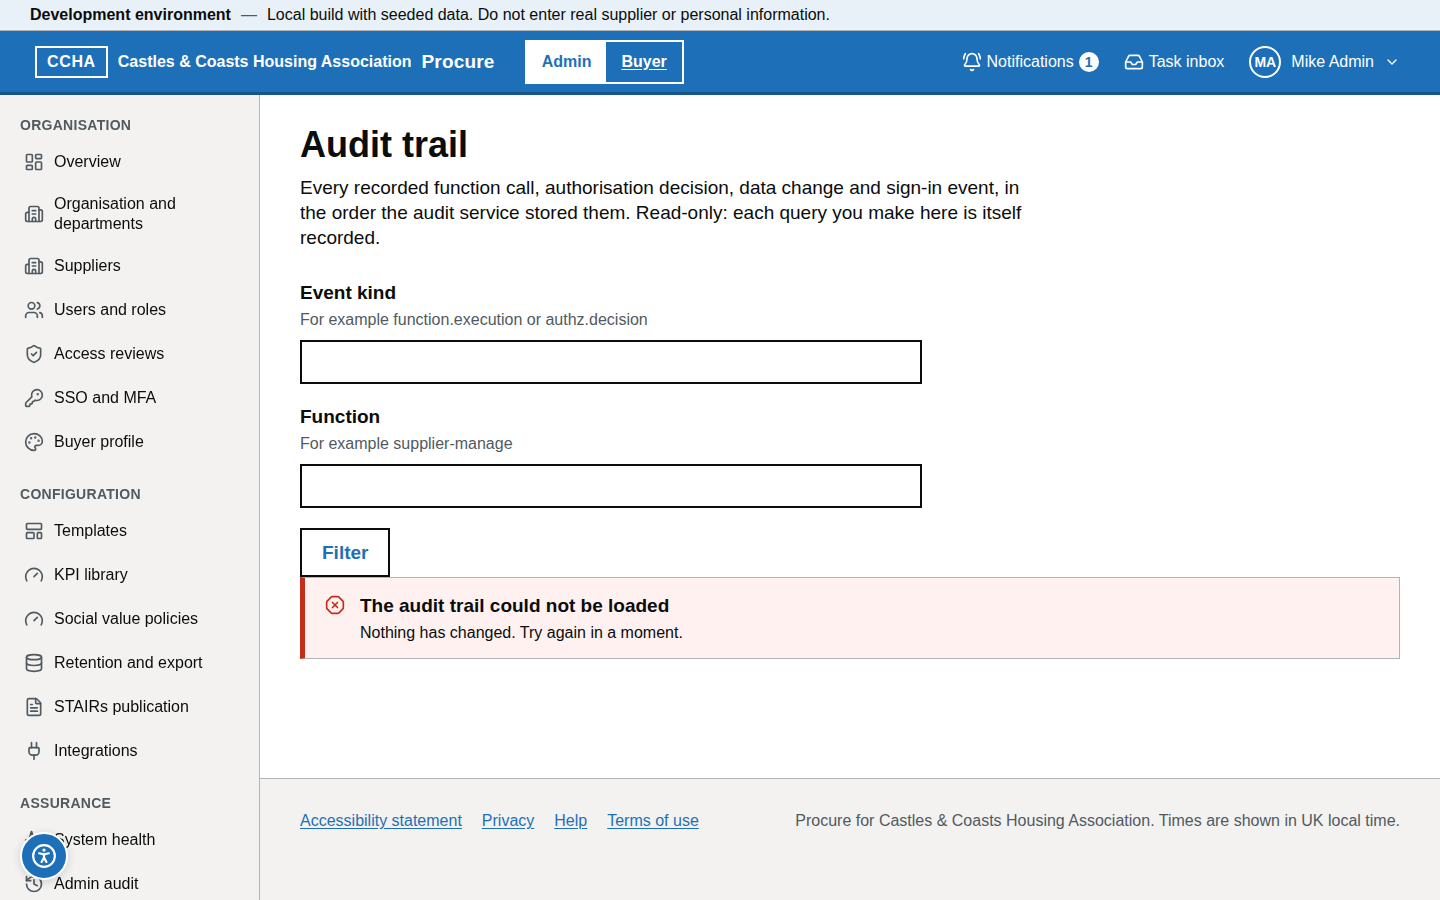
- Open Admin audit (or Audit trail): the warning "Only open the audit log for a permitted reason" appears every time you open it, and nothing from the log is shown until you choose I have a permitted reason – open the audit log. Open the log only for a permitted reason, such as an investigation, a complaint, a legal or regulatory request or an authorised check; your access is recorded, and misuse may constitute an offence under the Computer Misuse Act 1990. Go back leaves without opening it.
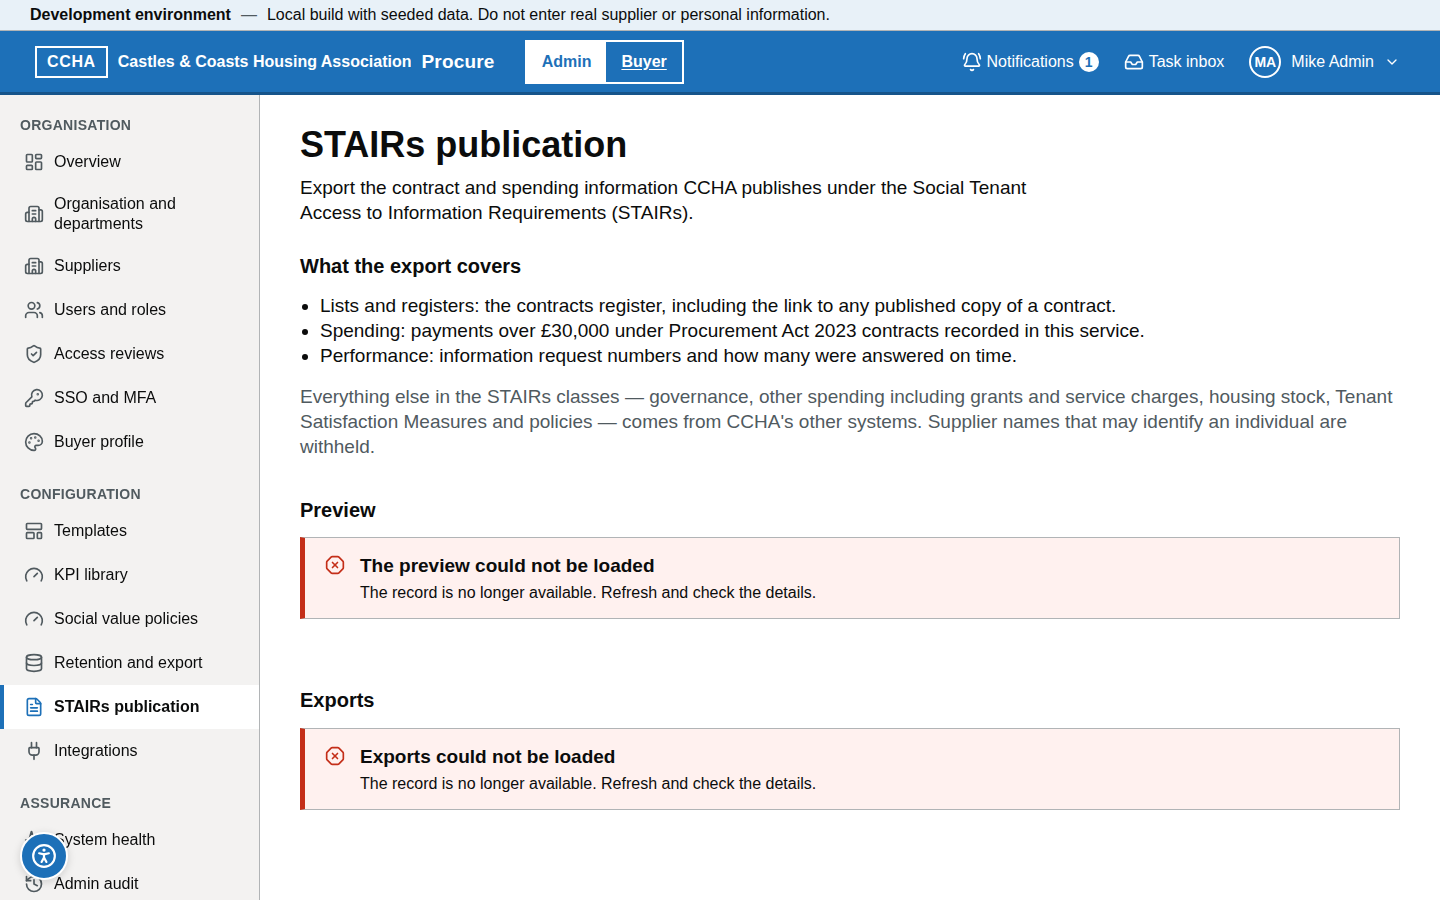
- Admin audit lists administration changes: users invited or deactivated, roles changed, branding, templates, retention, integrations.
- Filter by Actor, Table and date (From, To, London days); open a row for before/after values.
- Admin audit has no export: for internal audit, use Export on the Audit explorer in the buyer area (
/b/audit).
What you should see
Today's changes with actor, time and values.
Common problems
- A change with no actor. System changes (scheduled jobs) are shown as "System", and changes made by a function as "Function".
- Need the business audit. That is the Audit explorer in the buyer area.
Getting help (help panel, knowledge base, helpdesk hours)
The ? button (Help for this page) in the header opens the help panel with the article for that screen and, where one is planned, a Watch the video guide for this page link (the videos are not yet recorded; the link says so). From the panel you can open the full guidance or search the help by title and heading. Support contact details and hours are on the Help page (/help#contact in Geckr Procure). Administrators may also contact the Geckr account manager, with P1 cover as set out in the service description.
Glossary links
Glossary: team · role template · access review · MFA · SSO · retention · FTS mode · audit chain.