Welcome to Geckr Procure
Castles & Coasts Housing Association (CCHA) — Buyer & Platform Documentation Audience: CCHA staff | Platform: Geckr Procure
Geckr Procure is the procurement website Castles & Coasts Housing Association (CCHA) uses to run tenders under the Procurement Act 2023, and that suppliers use to find opportunities, respond to them and follow the outcome. This article explains what the website is for, who uses it, what each area offers and how to make it work well for you.
Who this is for
Everyone who is new to Geckr Procure: suppliers, CCHA staff of every role, evaluators and system administrators. Read it before your first sign-in, then go on to the article for how you get an account.
Before you start
- You need an email address you can open on the device you will use. Suppliers use a business address; CCHA staff use their CCHA work address.
- Use a current web browser (see Supported browsers and devices). Nothing needs to be installed, except an authenticator app on your phone or computer if your account uses two-step verification.
- You do not need an account to read the public pages: the home page (
/), the Buyer profile with the opportunities currently open to all suppliers (/buyer-profile), Help (/help), the accessibility statement, the privacy notice and the terms of use.
What the website is for
Geckr Procure holds the whole life of a procurement in one place:
- CCHA plans a procurement, publishes it with its documents and timetable, answers clarification questions and publishes the notices the Procurement Act 2023 requires.
- Suppliers register once, find opportunities, ask questions, complete questionnaires, upload documents and submit a sealed response before the deadline.
- CCHA evaluates and moderates the responses, sends every supplier its result and assessment summary, and manages the contract that follows.
Every change is recorded in an audit trail, so CCHA can show later who did what and when.
Who uses it
| Who | What they do | Where they work | How they sign in |
|---|---|---|---|
| Suppliers (administrators and members) | Register their organisation, respond to opportunities, manage colleagues and the organisation profile | Supplier area | A 6-digit code sent by email; optionally a password with an authenticator app. Microsoft, Google and Apple sign-in are not available yet |
| Procurement team | Run exercises, clarifications, openings, notices, standstill and contracts | Buyer area | Work email and password, or Microsoft sign-in where CCHA has it set up, then an authenticator code |
| Department users and contract managers | Raise requirements, complete tasks, record KPIs, manage their contracts | Buyer area | Work email and password; an authenticator app is optional |
| Evaluators and moderators | Score submissions and agree moderated scores | Buyer area | As for their usual role |
| Senior users | Approve exercises and awards; moderate | Buyer area | Work email and password, then an authenticator code |
| System administrators | Look after staff accounts, roles, departments, organisation details and branding | Admin area, plus the buyer area | Work email and password, then an authenticator code |
CCHA staff accounts are always created by a system administrator. Suppliers register their organisation themselves with Register your organisation, no invitation needed; the person who registers becomes its first administrator and invites colleagues. CCHA's procurement team can also set an organisation up and invite its first administrator. See Registering your organisation as a supplier, Joining your organisation on Geckr Procure and Your staff account: first sign-in.
The areas of the website
What you see in each area depends on the roles you hold, so your menu may be shorter than the lists below.
| Area | What it offers |
|---|---|
| Public pages | The introduction, Sign in and Register your organisation; CCHA's buyer profile and open opportunities; help, the accessibility statement, privacy notice and terms of use |
| Supplier area | Dashboard, Task inbox, Opportunities, My responses, Dynamic markets, Market engagement, Frameworks, My contracts, Organisation users (supplier administrators only), Organisation and Help |
| Buyer area | CCHA staff's procurement work: tasks, exercises, contracts, notices, reports and assurance. The staff guides describe the menu in full once you have signed in |
| Admin area | For system administrators: staff accounts and roles, departments, organisation details, branding, configuration and service health. The administrator guide describes it once you have signed in |
Staff never see the supplier area and suppliers never see the buyer or admin areas. A system administrator who also works in the buyer area moves between them with Switch to Admin area or Switch to Buyer area in the account menu.
Find your way around
Steps
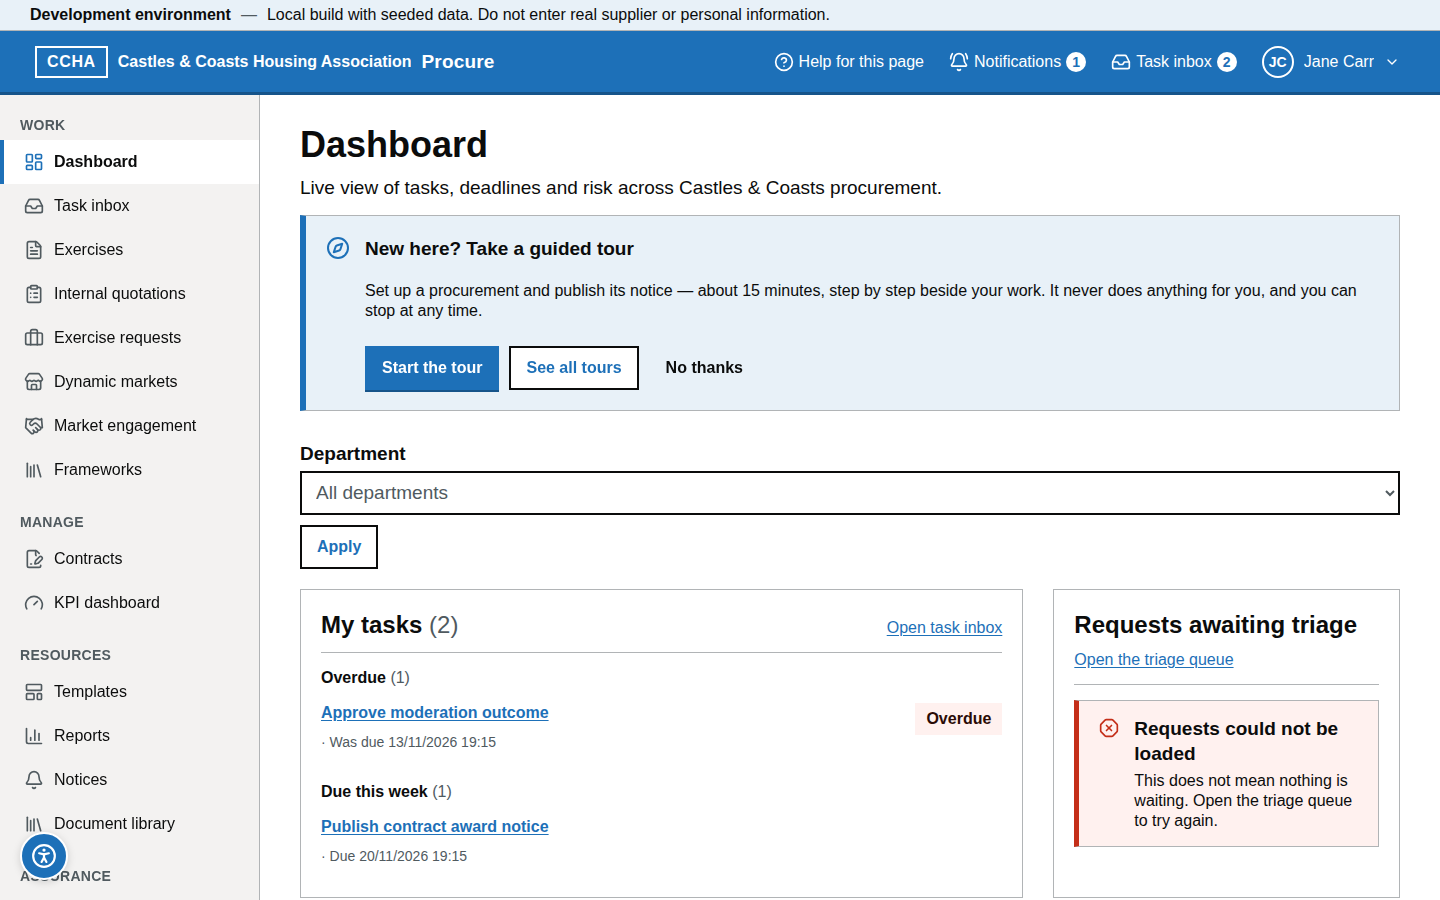
- After you sign in you land on your dashboard. Tasks that need your action come first.
- The header holds your account menu (your name). It shows your organisation, the area you are in and your roles, and links to Profile settings (staff) or My profile and Organisation profile (suppliers), any area you can switch to, Guided tours where they are offered, and Sign out.
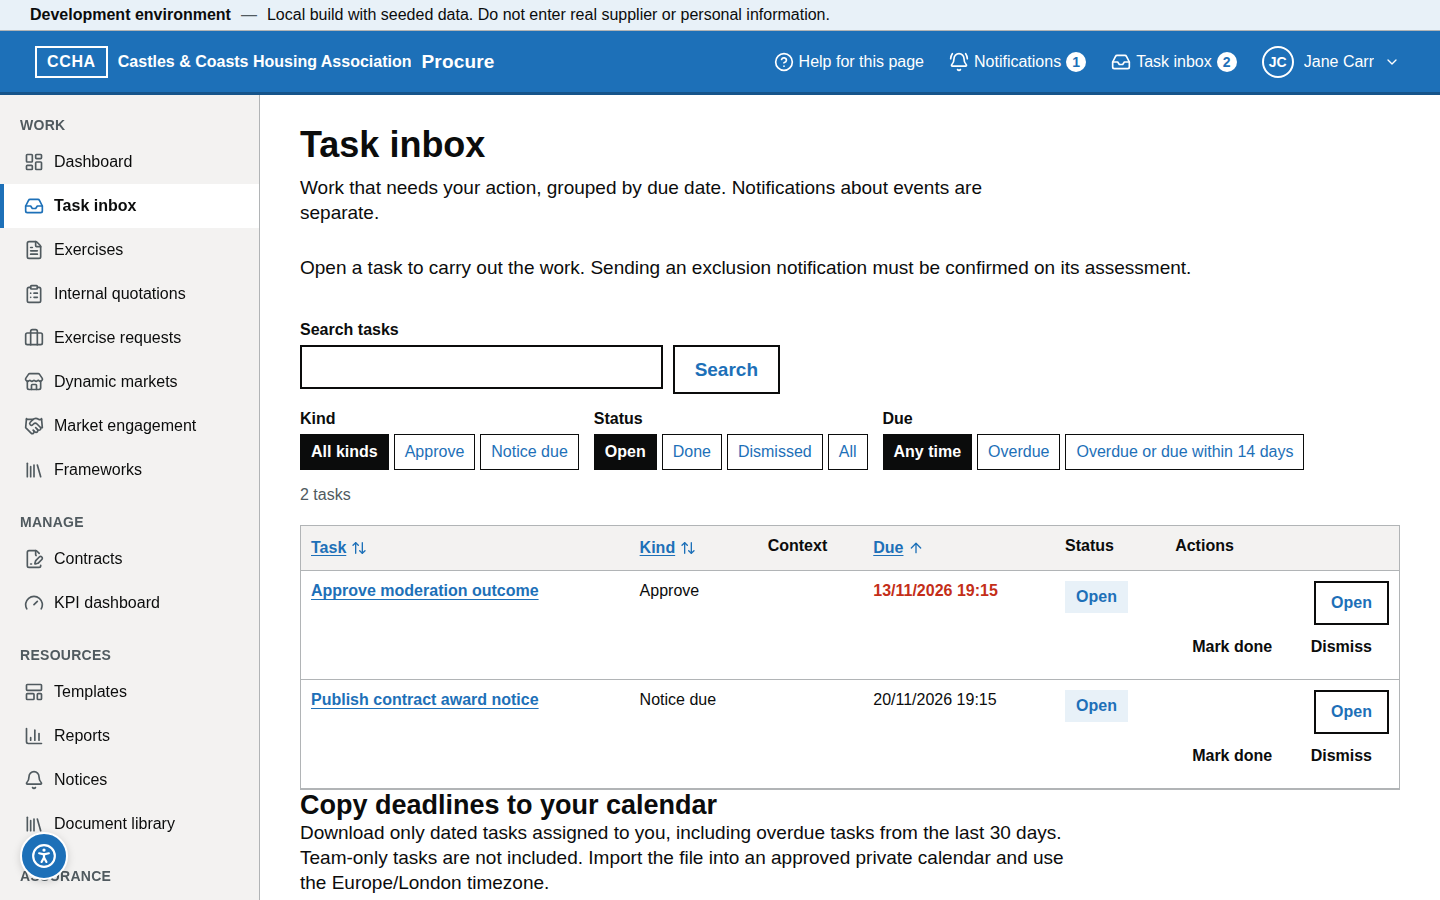
- Notifications in the header lists recent events; your Task inbox lists the work you must do.
- Help for this page in the header opens a short explanation of the screen you are on, with Open full guidance linking to the right part of these guides.
- The Accessibility button opens the display settings described below.
What you should see
Your dashboard with your name in the header and the menu for your area down the side (on a phone, behind the menu button).
Common problems
- A menu item you expected is missing. What you can see depends on the roles CCHA has given you. Ask your system administrator (staff) or your organisation's administrator (suppliers).
- "Your account has no access assigned yet". You have signed in but belong to no team yet. See If your account has no access yet.
Accessibility and display settings
Everything can be done with a keyboard and the layout reflows when you zoom to 400 %. The pages are built for screen readers, but have not yet been tested with screen-reader software (see the accessibility statement (/accessibility-statement in Geckr Procure)). You can also change how it looks.
Steps
- Choose the Accessibility button. The Accessibility and display panel opens.
- Under Contrast choose Automatic (follow your device), Standard, High contrast (black text on white) or High contrast (dark) (light text on black, with yellow links).
- Choose a Text size (100 % to 200 %) and a Page zoom (100 % to 200 %).
- Under Other visibility aids tick any of Underline all links, Increase text spacing, Use a more readable font, Stronger focus outline and Reduce motion.
- Changes apply straight away. Choose Reset to defaults to undo them, then close the panel.
What you should see
The page changes as you choose each option. The settings are remembered on this device and browser only; set them again on another device.
Common problems
- "Windows contrast theme detected". Your system colours take priority over the contrast choice. This is expected.
- High contrast came on by itself. Your device asks for more contrast, so Automatic follows it. Choose Standard to turn it off for this website.
- The settings disappeared. They are stored in your browser. Clearing site data, or using a private window, resets them.
Supported browsers and devices
The website is tested on the current and previous versions of Microsoft Edge, Google Chrome, Mozilla Firefox and Safari on a Mac, and on Chrome for Android and Safari for iPhone. It works on a phone screen 360 pixels wide and with the keyboard alone.
Keep your browser up to date. A sign-in code must be entered in the same browser you asked for it in, so avoid switching between browsers part-way through signing in.
Times and dates
Deadlines and times are shown in UK time, and say whether that is GMT or BST. A deadline of 12:00 always means midday UK time, wherever you are.
Take a guided tour
A guided tour walks you through a task step by step, beside your work. It explains each step, points at the button or form that does it and follows you as you move from page to page. It never does anything for you, and it never stops you using the page.
Steps
- Open your account menu (your name, at the top right) and choose Guided tours, or choose Take a guided tour in Help for this page. On a phone, Guided tours is in the menu. Your dashboard also offers a tour (New here? Take a guided tour) with Start the tour and See all tours; choose No thanks if you do not want it.
- Choose Start on the tour you want. The tour card appears in the bottom right-hand corner (on a phone, along the bottom of the screen). For a tour you have already started, choose Resume or Restart.
- Work as you normally would. When you open the page of another step, the tour moves to it. Next and Back move through the steps without leaving the page; when a step is on another page, Take me there opens it.
- Read the full guidance opens the guide section for the step. Show me where scrolls to the control the step is about.
- Choose Hide the guided tour (the cross at the top of the card), or press Escape in the card, to fold it away into the Guided tour button; choose that button to bring it back. End tour stops it, and on the last step Finish the tour ends it.
What you should see
A card with the tour's name, "Step 3 of 19" and the step, and a highlighted outline around the control the step is about, with the step's number and name beside it.
Common problems
- The tour is not offered. Guided tours lists only the tours for your roles. The worked examples, which use the training data, are on the training and test websites only.
- The highlight is not shown. The control is not on the screen yet (for example, a button that appears only once a form is complete), or you do not have the role that uses it. The step's text still applies.
- The tour started again from the beginning on another computer. Your place in a tour is kept in the browser you used, not in your account.
Getting help
- Help for this page in the header explains the screen you are on.
- Guided tours, in your account menu, walk you through a task step by step (Take a guided tour).
- Help (
/help) lists the guides you can read, has a search box and shows CCHA's support contacts. Suppliers also have Help in the supplier menu. - Account and organisation questions answers the most common sign-in and account problems.
- The role guides take you through each task: Supplier, Procurement team, Department user, Evaluator, Senior user, Contract manager and Administrator.
Glossary links
Audit chain · Exercise · Multi-factor authentication · Sealed submission · Task